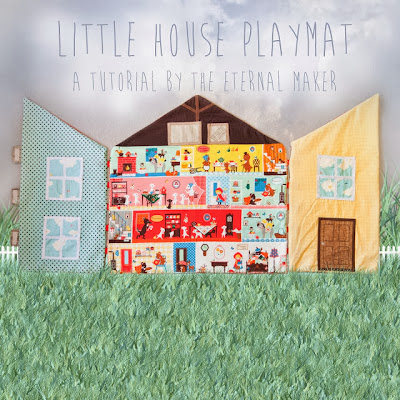
Little House Playmat Sew Along - Week Five
Welcome to the fifth and final week of our little house playmat sew-along! We hope you've enjoyed the project so far, we certainly have. Firstly I have to apologise for the slight delay in getting this post out - we lost power for a few days which caused a little bit of panic but it's all back now - phew! This week we will be making the little critters who live in your playmat - not only are these really cute on their own, they would make excellent christmas decorations if you add a little bit of ribbon! - OK, let's begin!
This week you will need:
- Scraps of woolfelt
- Embroidery thread
- Needle
- Toy stuffing
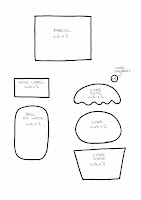
First things first, you'll need to print out your three A4 sheets of templates. Each of the links below will open up printable PDF files, when printing make sure you un-tick any box that says 'Shrink to fit', as this will alter the size of the pattern pieces.
Cut out your paper templates and pin them to the chosen coloured
felts and cut out as directed. We used our lovely woolfelts in a variety of plain
and marl colours.
Mark any embroidery you need to do with a disappearing
fabric maker – we found a “Sewline Duo Pen and Eraser Pen” was really useful at
this stage.
HAND EMBROIDERY
To sew on the
creatures eyes – take the white eye circle and place in position – then
use running stitches very close to each
other in varying sizes to create the pupil – this will also attach the white
eye circle.
Using photo 2 below as a
guide, hand embroider the following components and remember if you have cut out
two pieces for a creature these both need to be embroidered but in a mirror
image to each other.
If you need a helping-hand with your embroidery, I've included a handy simple stitch guide for you here.
 |
| Photo 2 |
The Hedgehog's body – add a nose and mouth and an eye –
sewing on the white eye circle as described earlier
The Squirrel's body – add running stitch black stripes to the
tail, add a black V shape to accentuate the ear. Stitch a mouth and nose, and
attach and stitch the eye as you did for the hedgehog.
The Duckling's Body – Attach the eye circle and stitch the
pupil as before.
The Bear's snouts – add a nose and mouth
Owl’s Tummy – Stitch on some back V shapes for feathers
Owl’s Eyes – Stitch the black inner eyes onto the white
outer eye pieces using the same method as before.
Wool Label – Stitch the word wool in black across the label
Ball of Wool – Stitch straight lines of running stitch in a
complimentary colour to the felt you have chosen to suggest the threads of
wool.
Parcel – use a back stitch to sew what looks like string or
ribbon tying up the parcel
Cake Case – use a running stitch to make the creases in the
cake case
Cake Icing – sew on the red circle cherries using the same
method as when you attach the creatures’ eyes.
MACHINE APPLIQUE
Now you need to appliqué on some components using the sewing
machine, and machine sew some components together – remember you can stitch
and then trim pieces you are stitching together for extra neatness. Have a look
at photo 3 below for guidance. Also, don’t forget if you are working on both sides of
a creatures to make the two sides, mirror images of each other.
 |
| Photo 3 |
Hedgehogs Body - Machine sew the hedgehog’s spikes to the hedgehogs
body, working down from his forehead, around the ear and down to the foot – repeat
for both sides of hedgehogs body in
mirror image.
Duckling – Sew together the two beak pieces. Sew together the
two feet pieces and put to one side.
Bear – Sew together the two snout/nose pieces. Appliqué on
the bears’ ear pieces – remembering to work in mirror image.
Owl - Sew together the owl’s two feet pieces. Then
machine appliqué - onto one body piece only – the owl’s tummy, beak and eyes.
Ball of wool – machine stitch the wool label across the centre
of one of the wool ball pieces.
Cake – machine sew on the icing onto the top of the cake, working
only along the wiggly bottom edge of the
icing. Then sew on the cake cases to the bottom of both the cake pieces.
(Note: you don’t have to do any machine stitching for the squirrel
or parcel at this stage)
Now begins the sewing together of the creatures – hoorah!
MORE MACHINE STITCHING
For these stages you can also refer to photo 4 below – which shows
the finished creatures in all their glory.
Hedgehog – Place your two completed hedgehog body pieces together
with the wrong sides facing each other. You may want to pin these together while
you are stitching. Machine stitch around the edges, working around 3 to 4mm
from the edge at all times, joining the two sides together. Start your stitching
at the bottom edge of the hedgehog’s lower foot and stitch up around the body,
then follow the edge of each spike and the down until you reach the bottom of
his spikes – leave the bottom of the hedgehogs body open and use toy stuffing
to stuff through this gap. Use enough to give the hedgehog a little body but not
make him too plump (A pencil or chopstick will help you poke stuffing into all
his spikes and nose etc.) Once plump enough, sew up the open gap using the machine
and tie off, secure and tidy up any loose
threads. As a last finishing touch you can trim any excess felt from the edges
of your work – you can go down to about 2mm away from the stitch line (just be
careful not to cut through your stitching at any stage).
Squirrel – He’s nice and easy – just place the two body pieces
with their wrong sides facing, pin, sew, stuff, trim and finish in exactly the
same manner as the hedgehog.
Duckling – Place the two body pieces together with wrong
sides facing and slip the beak and feet pieces in between the layers and pin in
place. Starting at the duck’s chin, machine stitch along the edge of the
duckling head enclosing and secure the beak as you go. Work around the rest of
the duckling’s head and wing – sew into the main part of the body following the
line of the wing to give shape to the wing. Stop stitching in the middle on the body – turn and stitch
back to the edge of your work following this line of wing stitching, then continue
to work around the edge following around the tail and bottom of the duckling –
secure the feet with stitching as you did with the beak and then remember to
leave a gap for stuffing as before. Trim and finish.
Bear – Firstly place the two bodies pieces wrong sides together
and insert the snout in the correct position and pin in place in between the
two body layers. The bear is slightly different as some portions of him (his
ear, tail and one arm and one leg) are sealed off with stitching and won’t be
stuffed.
Start stitching at the base of the chin and firstly enclose and
secure the snout, and then begin working your way around the body - refer to
diagram 1 for the direction of your stitching.
 |
| Diagram 1 |
Leave a gap between his arm and snout for stuffing. Stuff
the bear lightly and you will need to use a pencil or chopstick to poke
stuffing into all the parts. Finish in the normal manner.
Owl – Place your two owl body pieces together and insert the
foot piece at the base between the layers. Starting at the base of the owl, machine
stitch as normal, enclosing and securing the foot piece as you go. Work all the
way around the body, stuffing and finishing in the normal manner.
Ball of Wool – Place your two ball of wool pieces together with
wrong sides facing – stitch around the edge, stuff and finish as normal – easy!
Cake – Place your Cake pieces together with wrongs sides
facing each other. Starting at the base of the cake, stitch around the edge,
stuff and finish again in the same manner.
Parcel – Hey, we’ve saved the easiest to last! With wrong sides
together stitch around the parcel shape, stuff and finish as normal!
 |
| Photo 4 |
And that's it, you've completed all your little critters for the house playmat! Don't forget you can easily alter these by sewing in a piece of ribbon to make christmas (or any-time-of-year) Decorations! We hope you've enjoyed our sew-along as much as we have here at The Eternal Maker! If you've completed any part of this project we'd love to see!
Labels: critters, diy, felt stuffies, plushies, project, Tutorial


