The Eternal Maker Crafts

Wednesday, 23 March 2016

Grassy Basket

The daffodils are out, and it is definitely feeling like spring. That means that the Easter Bunny is gearing up for the weekend, with all his chocolatey treats.
Here is a quick Easter basket tutorial for those Easter egg hunts, which was inspired by a shopping trip to Waitrose - thanks Janette!

Happy sewing and hunting,
Amber

MATERIALS:
  • Card 
  • Two 20cm contrasting shades of Woolfelt for the grassy look (I have used Grassy Meadows and Moss) 
  • 20cm strip of Woolfelt for the base, I picked a dark contrasting green, Evergreen. 
  • Woolfelt for handle (or you can use left over bits from the base)
  • 10cm paper backed fusible web
  • Butterfly and/or flower buttons (from a selection in store)
  • Rotary cutter, Pinking blade, Scissors, Thread to match 

INSTRUCTIONS:
Firstly, make your templates for the grassy sides.
Cut one rectangle measuring 15cm x 14cm and another 25cm x 14cm.
The long sides being the base, from the base measure up 6cm and mark a line. Then mark a 1cm seam around the lower half.
Draw thin long triangles to replicate grass varying the hight of the points, and cut.

Using these templates, place facing up on the light Woolfelt and cut around. I used a rotary cutter then scissors to cut between the gaps to finish - being extra carful with the sharp blade.
Place face down on the dark Woolfelt and repeat.
When these are cut pair them up light with dark, and heat up the iron so that it gets nice and hot.

Cut the fusible web into 4.5cm strips. Using the manufacturers instructions, iron onto the front of the dark Woolfelt lined up with the base.

Peel off the paper backing and place the light green Woolfelt on top lined up with the top edge of the fusible web so that it is approximately 1cm lower then the base of the dark Woolfelt, iron on.

Cut the Woolfelt you pick for the base of the basket into a 25cm x 15cm rectangle.

Pin the grassy edges face up on the base, lined up with the edges. Machine sew the bottom of the grassy edge to the base, repeat on all sides, leaving a 1cm gap on each side.  Repeat for all the other sides.

Once the base is sewn, you'll see that the corner edges will naturally butt up together.  Pin them together how they naturally meet, ensuring that the base felt is pulled out of the way (it'll form a diamond shape in the corner joins).  Sew up each side.

On completion cut away the bulky excess, using a pinking blade on a rotary cutter to mimic the grass look (my new favouite tool!)

You have now got the basket base!
All that you need to do now is pick the colour, length and thickness of your handle. I have gone with some left over Evergreen from the base, cutting my strip 4cm x 40cm. Then using your matching thread hand sew on, at the base and also where the fusible web joins the colours.

Sew on some lovely buttons and you are set for all your Easter hunting, good luck finding all your treats! 

Labels: , , ,

Friday, 8 November 2013

Little House Playmat Sew Along - Week Five

Welcome to the fifth and final week of our little house playmat sew-along! We hope you've enjoyed the project so far, we certainly have. Firstly I have to apologise for the slight delay in getting this post out - we lost power for a few days which caused a little bit of panic but it's all back now - phew!  This week we will be making the little critters who live in your playmat - not only are these really cute on their own, they would make excellent christmas decorations if you add a little bit of ribbon! - OK, let's begin!

This week you will need: 
First things first, you'll need to print out your three A4 sheets of templates. Each of the links below will open up printable PDF files, when printing make sure you un-tick any box that says 'Shrink to fit', as this will alter the size of the pattern pieces.


Cut out your paper templates and pin them to the chosen coloured felts and cut out as directed. We used our lovely woolfelts in a variety of plain and marl colours.
Mark any embroidery you need to do with a disappearing fabric maker – we found a “Sewline Duo Pen and Eraser Pen” was really useful at this stage.

HAND EMBROIDERY
To sew on the creatures eyes – take the white eye circle and place in position – then use running stitches very close to each other in varying sizes to create the pupil – this will also attach the white eye circle.
Using  photo 2 below as a guide, hand embroider the following components and remember if you have cut out two pieces for a creature these both need to be embroidered but in a mirror image to each other.
If you need a helping-hand with your embroidery, I've included a handy simple stitch guide for you here.
Photo 2
The Hedgehog’s Spikes – add some black v-shaped spikes


The Hedgehog's body – add a nose and mouth and an eye – sewing on the white eye circle as described earlier

The Squirrel's body – add running stitch black stripes to the tail, add a black V shape to accentuate the ear. Stitch a mouth and nose, and attach and stitch the eye as you did for the hedgehog.

The Duckling's Body – Attach the eye circle and stitch the pupil as before.

The Bear's snouts – add a nose and mouth

Owl’s Tummy – Stitch on some back V shapes for feathers

Owl’s Eyes – Stitch the black inner eyes onto the white outer eye pieces using the same method as before. 

Wool Label – Stitch the word wool in black across the label

Ball of Wool – Stitch straight lines of running stitch in a complimentary colour to the felt you have chosen to suggest the threads of wool.   

Parcel – use a back stitch to sew what looks like string or ribbon tying up the parcel

Cake Case – use a running stitch to make the creases in the cake case

Cake Icing – sew on the red circle cherries using the same method as when you attach the creatures’ eyes.

MACHINE APPLIQUE
Now you need to appliqué on some components using the sewing machine, and machine sew some components together – remember you can stitch and then trim pieces you are stitching together for extra neatness. Have a look at photo 3 below for guidance. Also, don’t forget if you are working on both sides of a creatures to make the two sides, mirror images of each other.
Photo 3
Hedgehogs Body - Machine sew the hedgehog’s spikes to the hedgehogs body, working down from his forehead, around the ear and down to the foot – repeat for both sides  of hedgehogs body in mirror image.

Duckling – Sew together the two beak pieces. Sew together the two feet pieces and put to one side.

Bear – Sew together the two snout/nose pieces. Appliqué on the bears’ ear pieces – remembering to work in mirror image.

 Owl - Sew together the owl’s two feet pieces. Then machine appliqué - onto one body piece only – the owl’s tummy, beak and eyes.

Ball of wool – machine stitch the wool label across the centre of one of the wool ball pieces.

Cake – machine sew on the icing onto the top of the cake, working only along the wiggly bottom edge of  the icing. Then sew on the cake cases to the bottom of both the cake pieces.

(Note: you don’t have to do any machine stitching for the squirrel or parcel at this stage)
Now begins the sewing together of the creatures – hoorah!

MORE MACHINE STITCHING
For these stages you can also refer to photo 4 below – which shows the finished creatures in all their glory.

Hedgehog – Place your two completed hedgehog body pieces together with the wrong sides facing each other. You may want to pin these together while you are stitching. Machine stitch around the edges, working around 3 to 4mm from the edge at all times, joining the two sides together. Start your stitching at the bottom edge of the hedgehog’s lower foot and stitch up around the body, then follow the edge of each spike and the down until you reach the bottom of his spikes – leave the bottom of the hedgehogs body open and use toy stuffing to stuff through this gap. Use enough to give the hedgehog a little body but not make him too plump (A pencil or chopstick will help you poke stuffing into all his spikes and nose etc.) Once plump enough, sew up the open gap using the machine and tie off, secure  and tidy up any loose threads. As a last finishing touch you can trim any excess felt from the edges of your work – you can go down to about 2mm away from the stitch line (just be careful not to cut through your stitching at any stage).

Squirrel – He’s nice and easy – just place the two body pieces with their wrong sides facing, pin, sew, stuff, trim and finish in exactly the same manner as the hedgehog.

Duckling – Place the two body pieces together with wrong sides facing and slip the beak and feet pieces in between the layers and pin in place. Starting at the duck’s chin, machine stitch along the edge of the duckling head enclosing and secure the beak as you go. Work around the rest of the duckling’s head and wing – sew into the main part of the body following the line of the wing to give shape to the wing. Stop stitching  in the middle on the body – turn and stitch back to the edge of your work following this line of wing stitching, then continue to work around the edge following around the tail and bottom of the duckling – secure the feet with stitching as you did with the beak and then remember to leave a gap for stuffing as before. Trim and finish.

Bear – Firstly place the two bodies pieces wrong sides together and insert the snout in the correct position and pin in place in between the two body layers. The bear is slightly different as some portions of him (his ear, tail and one arm and one leg) are sealed off with stitching and won’t be stuffed.

Start stitching at the base of the chin and firstly enclose and secure the snout, and then begin working your way around the body - refer to diagram 1 for the direction of your stitching.
Diagram 1
Leave a gap between his arm and snout for stuffing. Stuff the bear lightly and you will need to use a pencil or chopstick to poke stuffing into all the parts. Finish in the normal manner.

Owl – Place your two owl body pieces together and insert the foot piece at the base between the layers.  Starting at the base of the owl, machine stitch as normal, enclosing and securing the foot piece as you go. Work all the way around the body, stuffing and finishing in the normal manner.

Ball of Wool – Place your two ball of wool pieces together with wrong sides facing – stitch around the edge, stuff and finish as normal – easy!

Cake – Place your Cake pieces together with wrongs sides facing each other. Starting at the base of the cake, stitch around the edge, stuff and finish again in the same manner.

Parcel – Hey, we’ve saved the easiest to last! With wrong sides together stitch around the parcel shape, stuff and finish as normal!
Photo 4
And that's it, you've completed all your little critters for the house playmat! Don't forget you can easily alter these by sewing in a piece of ribbon to make christmas (or any-time-of-year) Decorations! We hope you've enjoyed our sew-along as much as we have here at The Eternal Maker! If you've completed any part of this project we'd love to see!


Labels: , , , , ,

Monday, 21 October 2013

Little House Playmat Sew Along - Week Three

WEEK THREE – MORE APPLIQUE!

This week you will be completing more of your appliqué decoration and construction of the appliqué pockets on your playmat. Refer back to week one photos if clarification of playmat parts is needed - remember that your "door panels" (inside and outside) are different components to your "door appliques" (inside and outside).

More Pockets - Boxes in the roof
Before you start thinking about your appliqué pockets, sew on 12mm brown bias binding to create beams in the roof part of the house and roof panel. Sew on the bias binding by stitching approximately 2mm in from each folded edge of the bias. Have a look at Picture One below for positioning  – we made one central upright with two smaller cross beams.
Picture One
Roof box appliqués
Choose from your scraps some fabric for your roof boxes. You need to cut out two box shapes, one is 15cm x 10cm and the other is 9cm x 9cm.
Cut out the same size pieces of iron-on interfacing and iron these onto the reverse.
Now stitch any decoration you fancy onto the box before going any further. A disappearing fabric marker is really useful at this stage to mark your designs before stitching - we used a sewline pen and eraser pen, our favourite fabric marker. We used multiple lines of straight machine stitching to label one box as a tea chest and then some zig-zag machine stitching on the larger box to give the effect of wooden planks. Tie of all your threads and neaten up. See Picture two below for reference
Picture Two
Now bind around the raw edges of your two boxes with 25mm beige bias binding. Fold this over the raw edges as you did with the window appliqués and stitch 2mm from the folded edge of the bias closest to the centre of your fabric piece.  Stop stitching about 1cm before each corner - this will allow you to mitre the bias binding around each corner, pin the folded mitred corner in place and continue stitching on the next side of your fabric piece. (See picture three.) Fold over the raw edge on the cut end of your bias binding and tuck this in before you finish stitching and tie off any loose threads.
Picture Three
Once bound these boxes are ready to appliqué onto the roof space of your house and roof panel. Pin them into position (see picture four) and sew each one on with machine stitching 2mm from the outside edge of your bound boxes – make sure to leave the top edge of the boxes unstitched so that you form a pocket that your animals will be able to hide in later.
Picture Four
Now it's time to begin work on your door appliques!

Outside front door applique

Cut a 23cm x 16cm piece from the fabric chosen for your "outside front door applique".  Mark out door panels with bias binding (we chose light yellow) on the front of your door – ironing on skinny strips of bondaweb to the back of the bias binding makes this much easier to position – try to mitre the corners and tuck in any raw edges for a neat finish.  Iron these on in position and then stitch around working 2mm from each edge of the bias binding to attach it – we used a contrasting thread to create a 3D sketchy affect. 

Cut a tiny circle of fabric with bondweb on the back for a door handle, iron and then stitch this on too. Then tie off any loose threads. (see picture five below for reference) Now cut a 23cm x 16cm piece of bondaweb and iron this onto the back of the front door.
Picture Five

Inside front door applique

Cut a 23cm x 16cm piece from the fabric you have chosen for your inside front door applique. This time we chose a brown fabric with a cross weave print for texture. Iron on some fusible interfacing to the reverse of your door applique - this will make it easier to handle as you are doing the decorative stitching. Now stitch any decoration onto the door you like, again we found a disappearing fabric marker is really useful. This time we stitched with a small zigzag stitch to mimic the panel design on the outside of the front door. Then we added a handle in exactly the same way as before. (Remember, if you're a stickler for detail like me, the door handle needs to be attached on the opposite side of your "inside front door applique" to the "outside front door applique" - Just a thought!) Have look at picture six. 
Picture Six
Once you're happy with your door design, tie of all your threads and neaten up!

Positioning and stitching on door and window appliques on the outside door panels
Take your "outside door panels" (from week one) and lay them out on your work surface - use picture seven below and the details below as a guide for positioning your windows and "front door appliques".
 

Picture Seven
Firstly, concentrate on the right hand "outside door panel". You want to position the "outside front door applique" in the centre of your "outside door panel" about 3cm from it’s bottom edge.
Remove the paper backing from the bondaweb on the "outside front door applique" and iron the door in position. Stitch around all edges of the door using a zig-zag stitch approximately 3mm wide to attach it, working right at the edge of the fabric of the door.

Outside window appliques 
Now take your prepared "outside window appliques" from week two. Cut pieces of bondaweb to the same size as your "outside window appliques" and iron them on the reverse of each window.  Take your right hand side "outside door panel". Position one of your "window appliques" on the "outside door panel" about 9cm above the door in a central position. Once you are happy with the position of your window, peel off the paper backing of the bondaweb and iron in position.

Now take your left hand side "outside door panel" and position your two windows on this side (again use picture seven above as a guide). You will need to make sure they are both in a central position and also to make sure the two, first floor windows, are on the same level on both the left and right hand panels. Again once you are happy with the positioning of all your front windows and front door, peel off the bondaweb's paper backing and iron your windows onto your door panels.

Now the windows are temporarily attached, you are going to use bias binding to fix them in place permanently and to finish creating the window pane effect.

Firstly have a quick measure round your window to work out roughly how much bias you are going to need to go around the two long sides and the top of your window. Cut a length of 12mm white bias binding slightly longer than this measurement and iron a very thin strip of bondaweb on the back, along the full length (as you did on the panelling for the "outside front door applique"). 
Iron the bias binding in place so that it covers all the raw edge of your window applique on the two vertical sides and the top edge - mitre the corners neatly as you did when making the roof boxes. Once this is ironed into position stitch it down to secure it, using a straight stitch about 2mm from, firstly the inside edge, then the outside edge of the bias binding. See picture eight below. Repeat this process for each of the three "outside window appliques".

Picture Eight

Now your are going to create window sills as shown in picture 9 below. To do this cut a strip of 25mm white bias binding long enough to cover the full length of the bottom edge of your window pane, with about 2cm extra on each end to allow you to tuck the raw edges under and to make a slightly extended window sill (Have another look at picture 9 - it's simplier than it sounds!) Iron a thin strip of bondaweb onto the back of the bias binding as before and iron it into position. Again use straight stitching 2mm from the edge and work all the way around the bias binding window sill making sure you tuck those raw edges in as you go.
Again repeat this for all three outside window appliques.

Picture Nine
Going back to your front door applique, in exactly the same way as your window sills, create a door step under your front door using 25mm brown bias binding - use picture 10 as a reference - you will notice we have elongated it on the right hand side because we are going to applique on a pot plant later!
Picture Ten
Positioning and stitching on door and window pockets on the inside door panels

Now is the time to position your "inside window pockets" and "inside front door applique" onto the "inside door panels".

You need to position these in a similar place to where they are positioned on the "outside door panels". To do this we used the "outside door panels" as a guide. Firstly we laid the "inside door panel" that you're about to work on, face down on our work surface then laid the completed "outside door panel" ontop of it, face up. (The wrong sides of the panels will be facing and all the edges of the outside and inside panels match - see diagram 1.)
Use pins to poke straight down through all the layers, at the corners of the window and door appliques . Carefully flip your panels over and where the sharp ends of the pins are poking out on the inside panel, mark with a fabric marker. This will give you your guide as to where to position your window and door pockets on the "inside door panels" (this will also help you make sure that both your "front door appliques" are on the same side panel as you open your playmat!) Anyway, you can put away your pins and "outside door panel" away for now and concentrate on stitching on your pockets.

It's worth noting here that these will be pinned and then sewn on around the edges, rather than "bondawebbed" on as before. This is because you want to make pockets for your creatures to hide in, not bog-standard appliques!

How to construct an inside window pocket 
Take your "inside window pieces" you created in week two. Remember you will have two pieces to each window pocket you are about to make (one" top window pocket piece" and one "bottom window pocket piece" per window - it's all quite logical really!)
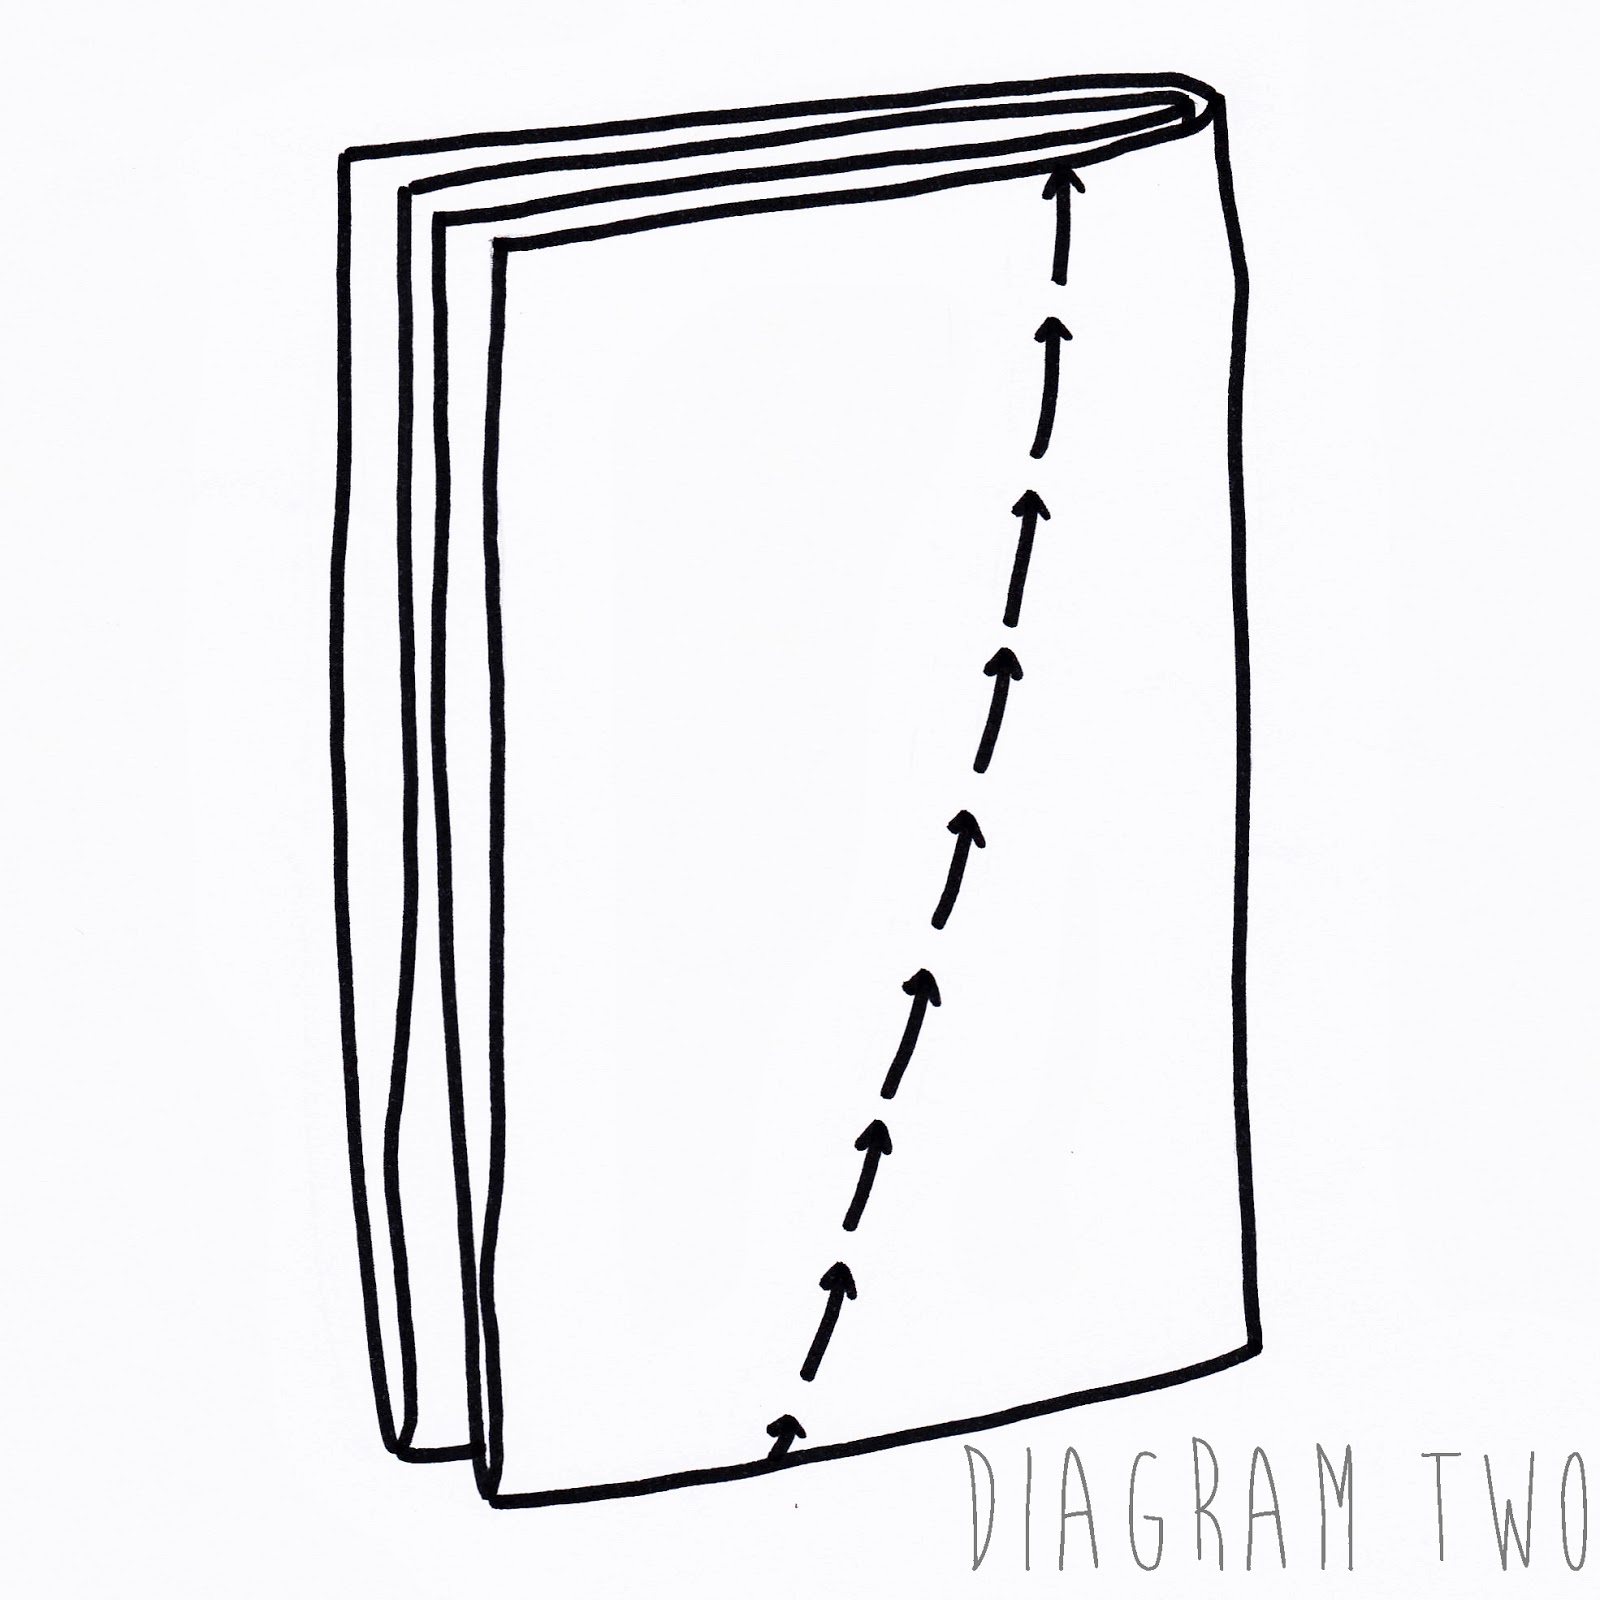
Use the marks you just made on your "inside door panel" to position the top corners of your top window pocket piece (double check you have got any birds on your sky fabric up the right way!). Pin this in place and then using a straight stitch 2mm from the outside edge of the bias binding, attach your top window pocket piece by stitching along the vertical sides and the top of the window piece. (See diagram 2 below) Do not stitch across the bottom edge of the top window piece - leave this open.
Now position your "bottom window pocket piece" beneath the "top window pocket piece" matching the bottom two corners of the bottom window pocket piece to the bottom marks you made on your "inside door panel". You need to make sure that the top edge of bias binding on the "bottom window pocket piece" overlaps and covers the bias binding on the bottom edge of the "top window pocket piece" (this sounds more complicated than it is so have a look at diagram 3 and picture 11 if you are unsure - it basically means you only have one width of bias binding on view going horizontally across the inside of your window.) 
Picture Eleven
Again pin this "bottom window pocket piece" in place and then use a straight stitch 2mm from the outside edge of the bias binding to secure it. Attach your "bottom window pocket piece" by stitching along the vertical sides and the bottom of the window piece. (again see diagram 3) Do not stitch across the top edge of the "bottom window piece" - leave this open and you have completed your first window pocket for your creatures to hide in - Well done!

Now repeat this process to create the other two window pockets on the inside panels. 

Making your inside front door pocket.
Take your "inside front door applique" from earlier and bind all four edges with 25mm brown bias binding using the same method of binding as you did for constructing the roof box pockets. Now pin this in place using the marks you made on the "inside door panel" as before. Stitch on the door pocket by working 2mm from the outside edge of the bias binding - only stitch the top and bottom edges and the right hand side edge. Leave the left hand side edge open to allow your creatures to hide behind the door! See picture Twelve and diagram 4 below.
Picture Twelve
Ok, now your inside door panels are complete - big well dones all round!
 
Other ideas for extra appliqué decorations 
Now we wanted to be a bit fancy and do a bit more applique on the "outside door panels" - you can let your imagination run riot here - you can really personalise your house in whichever manner you like - how about making it look like a mini version of your actual house? Or maybe your dream house? As always, it's the little personal details that make projects like this so satisfying.
 We added a roof and some pot plants on our window sills and door step, but you can add as much (or a as little) extra decoration as you like.

An easy method to create the more fiddly additions (such as the pot plants) is to take some bondaweb and trace pictures (from magazines or books or print them from the web) onto the paper backing. Cut this out roughly, then iron the bondweb onto your chosen fabric - leave the bondaweb paper backing attached and then cut out neatly following your drawn lines - then peel away the paper backing - position on your house panel, iron on, and stitch around as before to secure them - it really is that simple. 
 
If you are unsure, have a practice on some scraps first, but think about fabric and thread choices - there is a world of opportunity sitting in your scrap box I'm sure - maybe you have fabric with a great illustration on ready to cut out and applique right onto your fabric? And don't forget to think about your stitching style as well - we used a straight stitch for our tree trunks but a spikey zigzag stitch to attach the pot plants and make them look like cacti.
Adding the roof
Finally we added the roof. To do this we firstly cut 50cm of jumbo ricrac in white and pinned this on about 10cm from the top of your "outside door panel", running parallel to the slope of the roof. (See picture 13) Then cut a piece of red fabric about 50cm x 15cm, lay this ontop of the jumbo ricrac and again following the slope of the roof. One side of the bumps of the ricrac just needs to poke out at this stage (see picture 14). Pin this in place. Stitch through your red fabric, jumbo ricrac and "outside door panel" in a straight line following the centre line of the ricrac - then flip the red fabric over and iron it flat - the other side of the bumps of the ricrac should be secure but poking out from underneath the sewn on red fabric. Once this is ironed flat, we top-stitched along the folded edge of the red fabric (about 2mm from the folded edge) to secure it further and stop it moving around (picture 15). Then we flipped the "outside door panel" over again and cut off any excess red fabric and ricrac following the original edge of the "outside door panel" and returning it to its original shape. (picture 16).
Picture Thirteen
Picture Fourteen
Picture Fifteen
Picture Sixteen

Repeat this process to add the roof to your other "outside door panel".

 
After all that hard work your will now have completed two "outside door panels" (see picture seventeen) two "inside door panels" and one "house panel"!
Picture Seventeen
(ok you caught us! We hadn't attached the roof here yet - but you get the idea!)


Well done again on all your hard work. Next week we will be joining all our pieces, constructing and quilting our playmat.

Labels: , , , , , , ,

Monday, 14 October 2013

Little House Playmat Sew Along - Week Two


WEEK TWO – PERPARATION OF APPLIQUE DECORATION OF FRONT AND INSIDE DOOR PANELS

You will need:
  • Fusible web “Bondaweb” or “WonderUnder” – approximately 1 metre.
  • Medium iron-on interfacing – approximately 1 metre.
  • Scraps of fabric for door, curtains, boxes in the roof  and other decorative appliqués in a variety of colours. The largest size piece will be for the appliqué door which is 17cm x 25cm.
  • 3 x grey fabric pieces 20cm x 16cm
  • 12mm bias binding in white for the sash windows – approximately 5 metres
  • 25mm bias binding white for the sash windows – approximately 6 metres
  • 12mm bias binding for the door appliqué in a colour of your choice – approximately 2 metres
  • 12mm bias binding in brown for the beams in roof – approximately 1 metre
  • 25mm bias binding in brown for the inside door – approximately 1 metre
  • 25mm bias binding in beige for the boxes in the roof – approximately 2 metres
  • (You will also need the fabric scraps that you saved from cutting your house panel pieces last week)
  • And a removable (either wash or fade away) fabric marker would also be very useful if you have one.
This week we begin the appliqué decoration of  your playmat – eventually you will be appliquéing onto both the inside and outside door panels separately and the roof part of the house panel.

Inside Window Pocket Appliques
You will need your two edges of sky print that you cut from your house panel in week one.
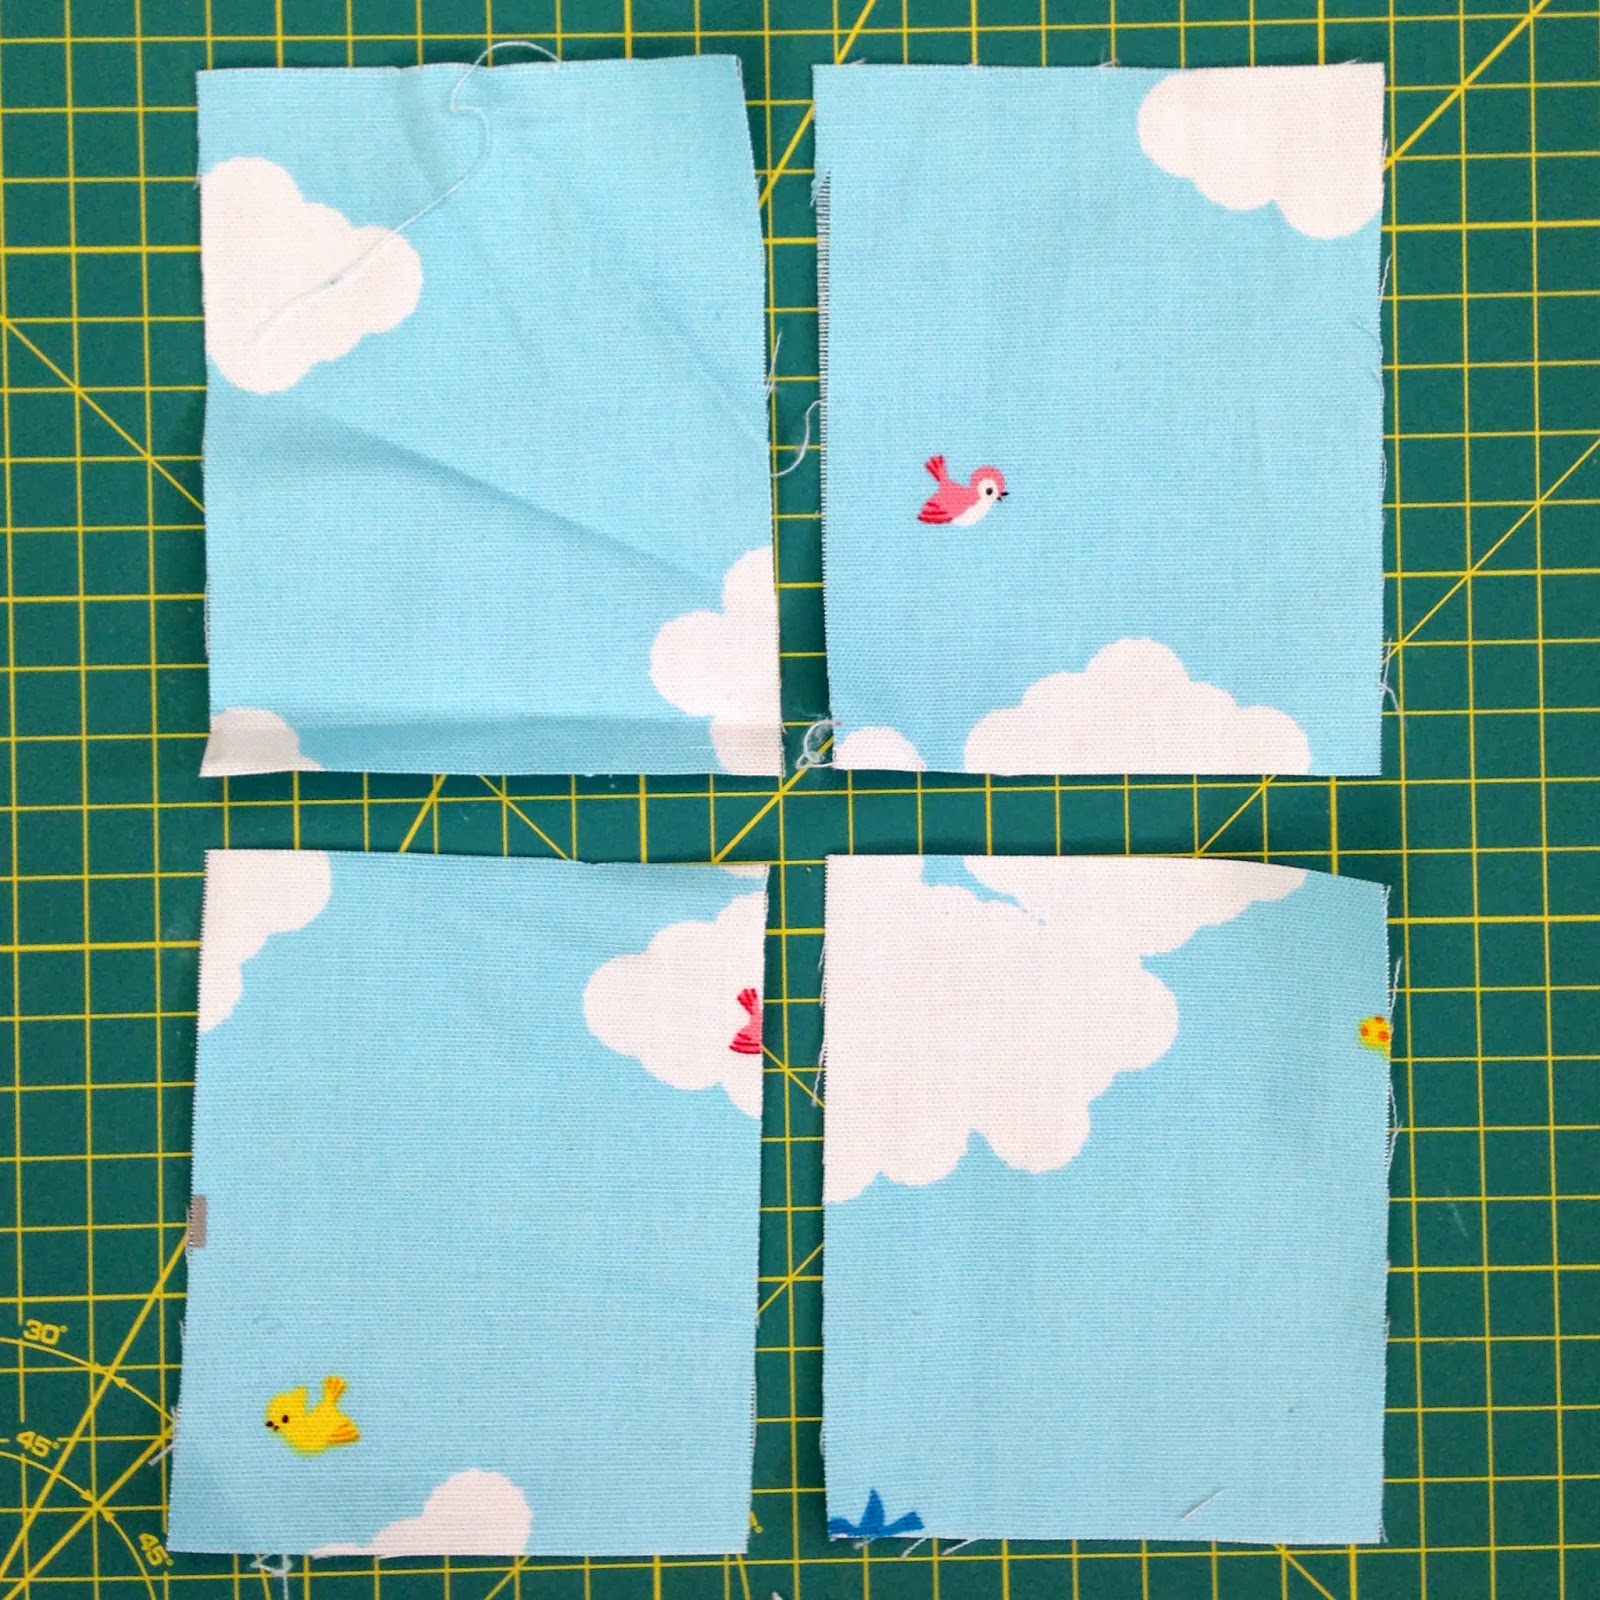
Cut both of these sky pieces into thirds as shown in Picture one below, making 6 sky pieces in total. (Each piece should have a long length of approx 20cm)

Picture One

Now take one of these 20cm pieces and cut the 20cm length into two pieces of 10cm. Then trim  the width of these pieces to 8cm – making two pieces of 10cm x 8cm.  As you are trimming to 8cm wide try and avoid any bits of print with chimneys or selvedge in your cut pieces and remember your birds should be flying the right way up! (Four of these 8cm x 10cm pieces are shown in Picture two).
Picture Two
Keep cutting until you have 12 sky pieces of 8cm x 10cm in total. These will make your inside window pockets. You may want to lay these out in set of four as shown in Picture two to get some idea of how your windows will look.
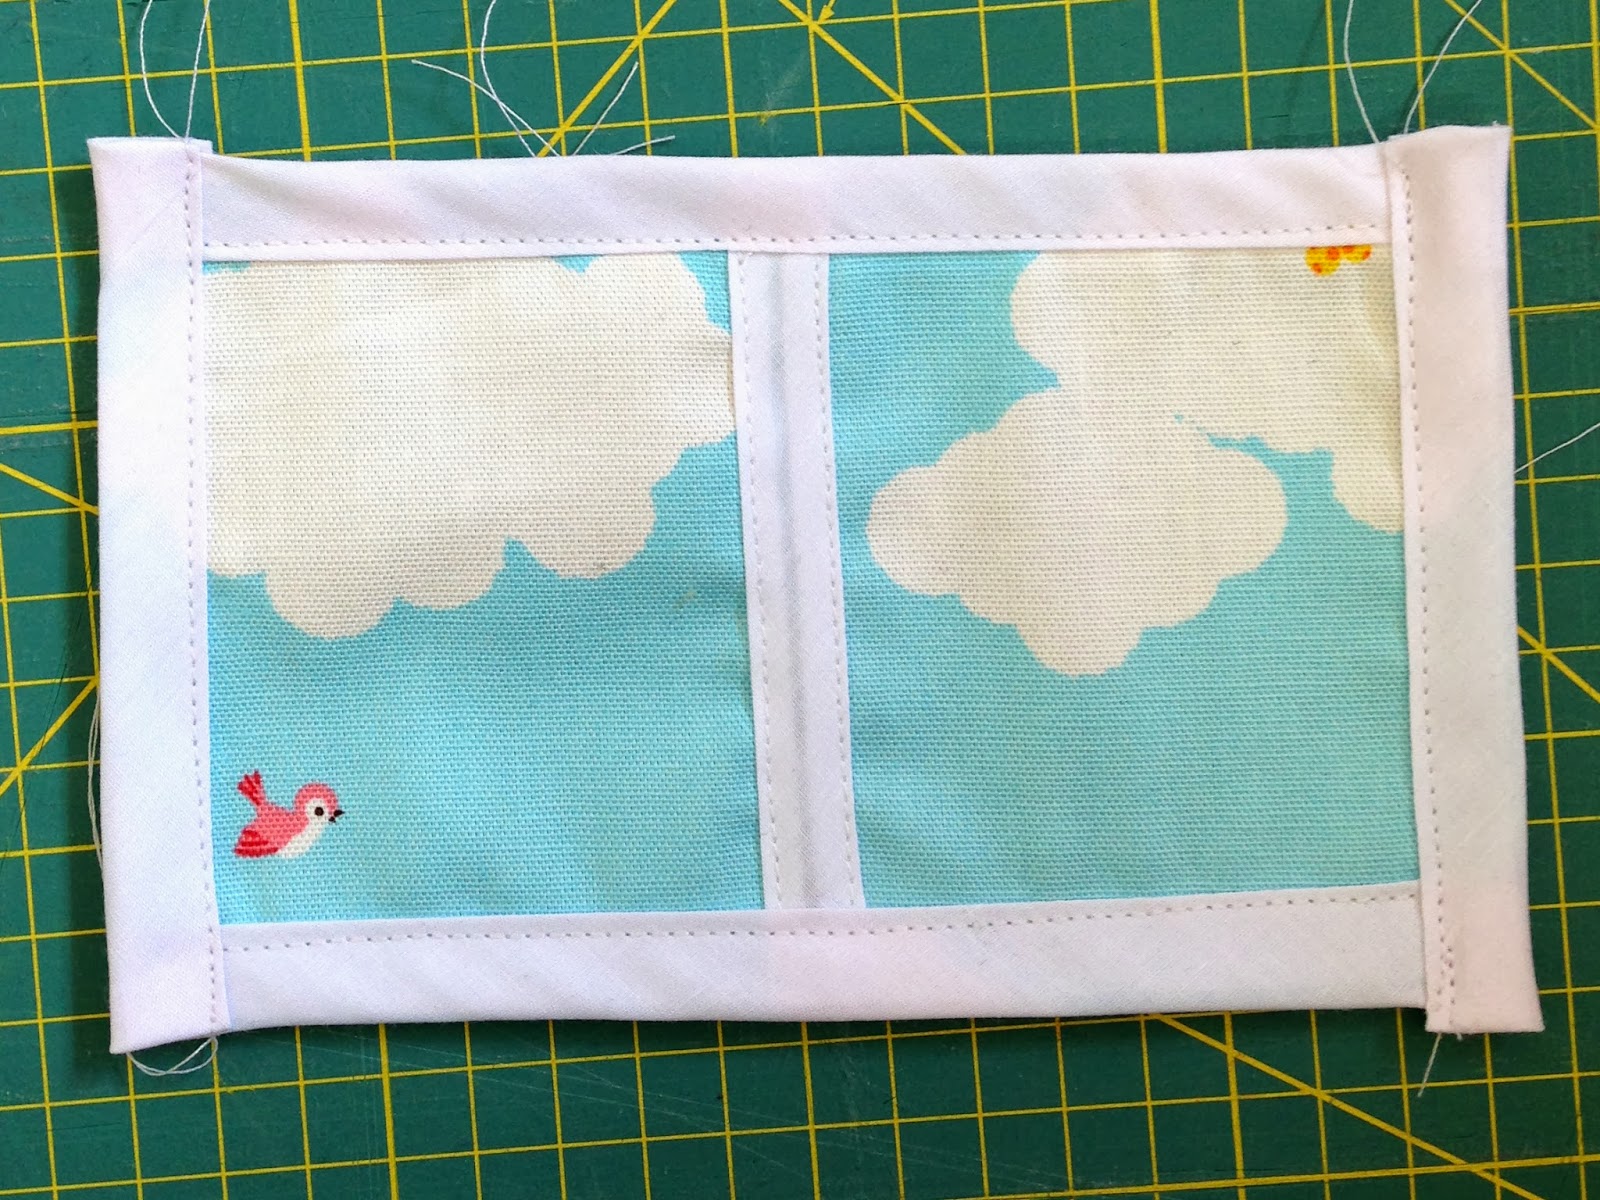
To begin making your window pockets use 12mm white bias binding to join two pieces down the 10cm length. As shown in picture three.  Place the two sky pieces next to each other on your cutting surface so that the 10cm edges butt up against each other. The bias binding is then placed ontop to cover the raw edges and top stitched on to join the two pieces of sky fabric. When top stitching, stitch approximately 2mm from the folded edge of the bias, firstly on one edge of the bias and then on the other. (Also see Diagram One below)  You will now have the two sky pieces joined by a bias strip as shown in Picture three.  Repeat this process with all of your sky pieces making six joined sky pieces.

Picture Three
Of your six joined sky pieces three will form tops of your window pockets and three will form the bottoms of your window pockets.

Top of the window pockets
Take one of your joined sky pieces and using 25mm white bias bind the top and bottom edge of this joined sky piece. This time you will be folding the bias over the raw edges and stitching on it on working again approximately 2mm from the edge – this time only stitch the edge of the bias closest to the centre of the window piece - see picture four below.
Picture Four
Then trim the edges of the bias to be flush with the edges of your fabric and bind the 8cm edges  of your sky fabric in the same way – this time remembering to fold over the raw edge of your bias binding at each end to create a neat finish. Again only sew the edge closest to the centre of your work - See Picture Five.
Picture Five
Repeat these processes to make a total of three top window pocket pieces.

Bottom Window pockets
The process for the bottom of the window pocket piece is very similar to the top window pocket piece but has a lining.
Take one of the joined sky pieces put aside for the bottom window pockets and use this as a guide to cut three pieces of pocket lining from the fabric you saved when cutting out the inside door panels in week one - See Picture Six.
Picture Six
Lay the joined sky piece on top of the lining piece with the wrong sides facing and bind the top edge with 25mm bias binding as you did for the top window pocket pieces as before . See Pictures seven and eight.
Picture Seven
Picture Eight
Now bind the bottom edge and the two side edges in exactly the same manner as you did for the top of your window pockets. Repeat these processes to create three “bottoms of window pockets". These will be sewn to the inside of your door panels next week.
Outside window appliques
Cut 3 pieces of grey fabric 20cm x 16cm.
Choose fabric from your scraps to make your curtains. An easy way to do this is to firstly cut another 20cm x 16cm piece from your scraps and iron on bondaweb to the reverse side leaving the paper on for the moment.  Then fold this piece into four and cut a curved line as shown in diagram two – this will give you two mirror image curtain pieces.
Now remove the bondaweb’s paper backing from both curtain pieces and iron onto the grey fabric as shown in picture nine, below.
Next sew on two pieces of 12mm white bias binding in a criss cross fashion across the centre of your window to create a window pane effect. (Stitch 2mm from each edge of the bias binding when doing this.) Again see Picture Nine. Repeat these process to create three  outside windows.
Picture Nine
Now all your outside and inside window components are complete. Well done!

NEXT WEEK – We will be stitching some more appliqué decorations and attaching them to your inside and outside of your door panels. The materials list at the beginning of this entry still stand for week 3, keep hold of all the bits you have and haven't used and we'll see you next week for part three!
♥

Labels: , , , , , , , , ,