New Deliveries! And A Babygrow Play-Cube Tutorial
Well a lot of things have been happening at The Eternal Maker since we last spoke, as always we've had lots of lovely new deliveries of fabric but we've also had some bigger events going on in our lives too, like planning a new roof for our shop and one very special new delivery - our first Eternal Maker baby!
Yes, we are pleased to announce that our shop manager Rachael had a baby boy shortly after Christmas last year, so in his honour, here's a simple make, for all new arrivals. It can be made with cotton jersey fabric or upcycled babygrows - a lovely way to get more use from those first favourite outfits!

You will need:
At least three babygrows or vests (we used four, first size, vests)
Or..... a selection of any other fabrics. Cotton jerseys give you a lovely soft finish and organic options are great for chewing too! (One long quarter will be enough for your cube but it will look nicer if you use a variety of fabrics) Brushed cottons or minky-type "cuddles" fabric will give you fun textures for feeling.
One long quarter of Vilene
Some toy stuffing
Needles and thread and/or sewing machine
Scraps of "Bondaweb" if doing any applique
Jingle bells and child proof pot, or teddy squeakers, are optional
1) If you are using fabric by the metre skip to next instruction.
If you are using babygrows or vests, start by cutting away any seams and poppers, leaving the largest pieces of flat fabric you can. From vests you will get one piece from the front and one from the back. From babygrows you may get two pieces from the front or back.
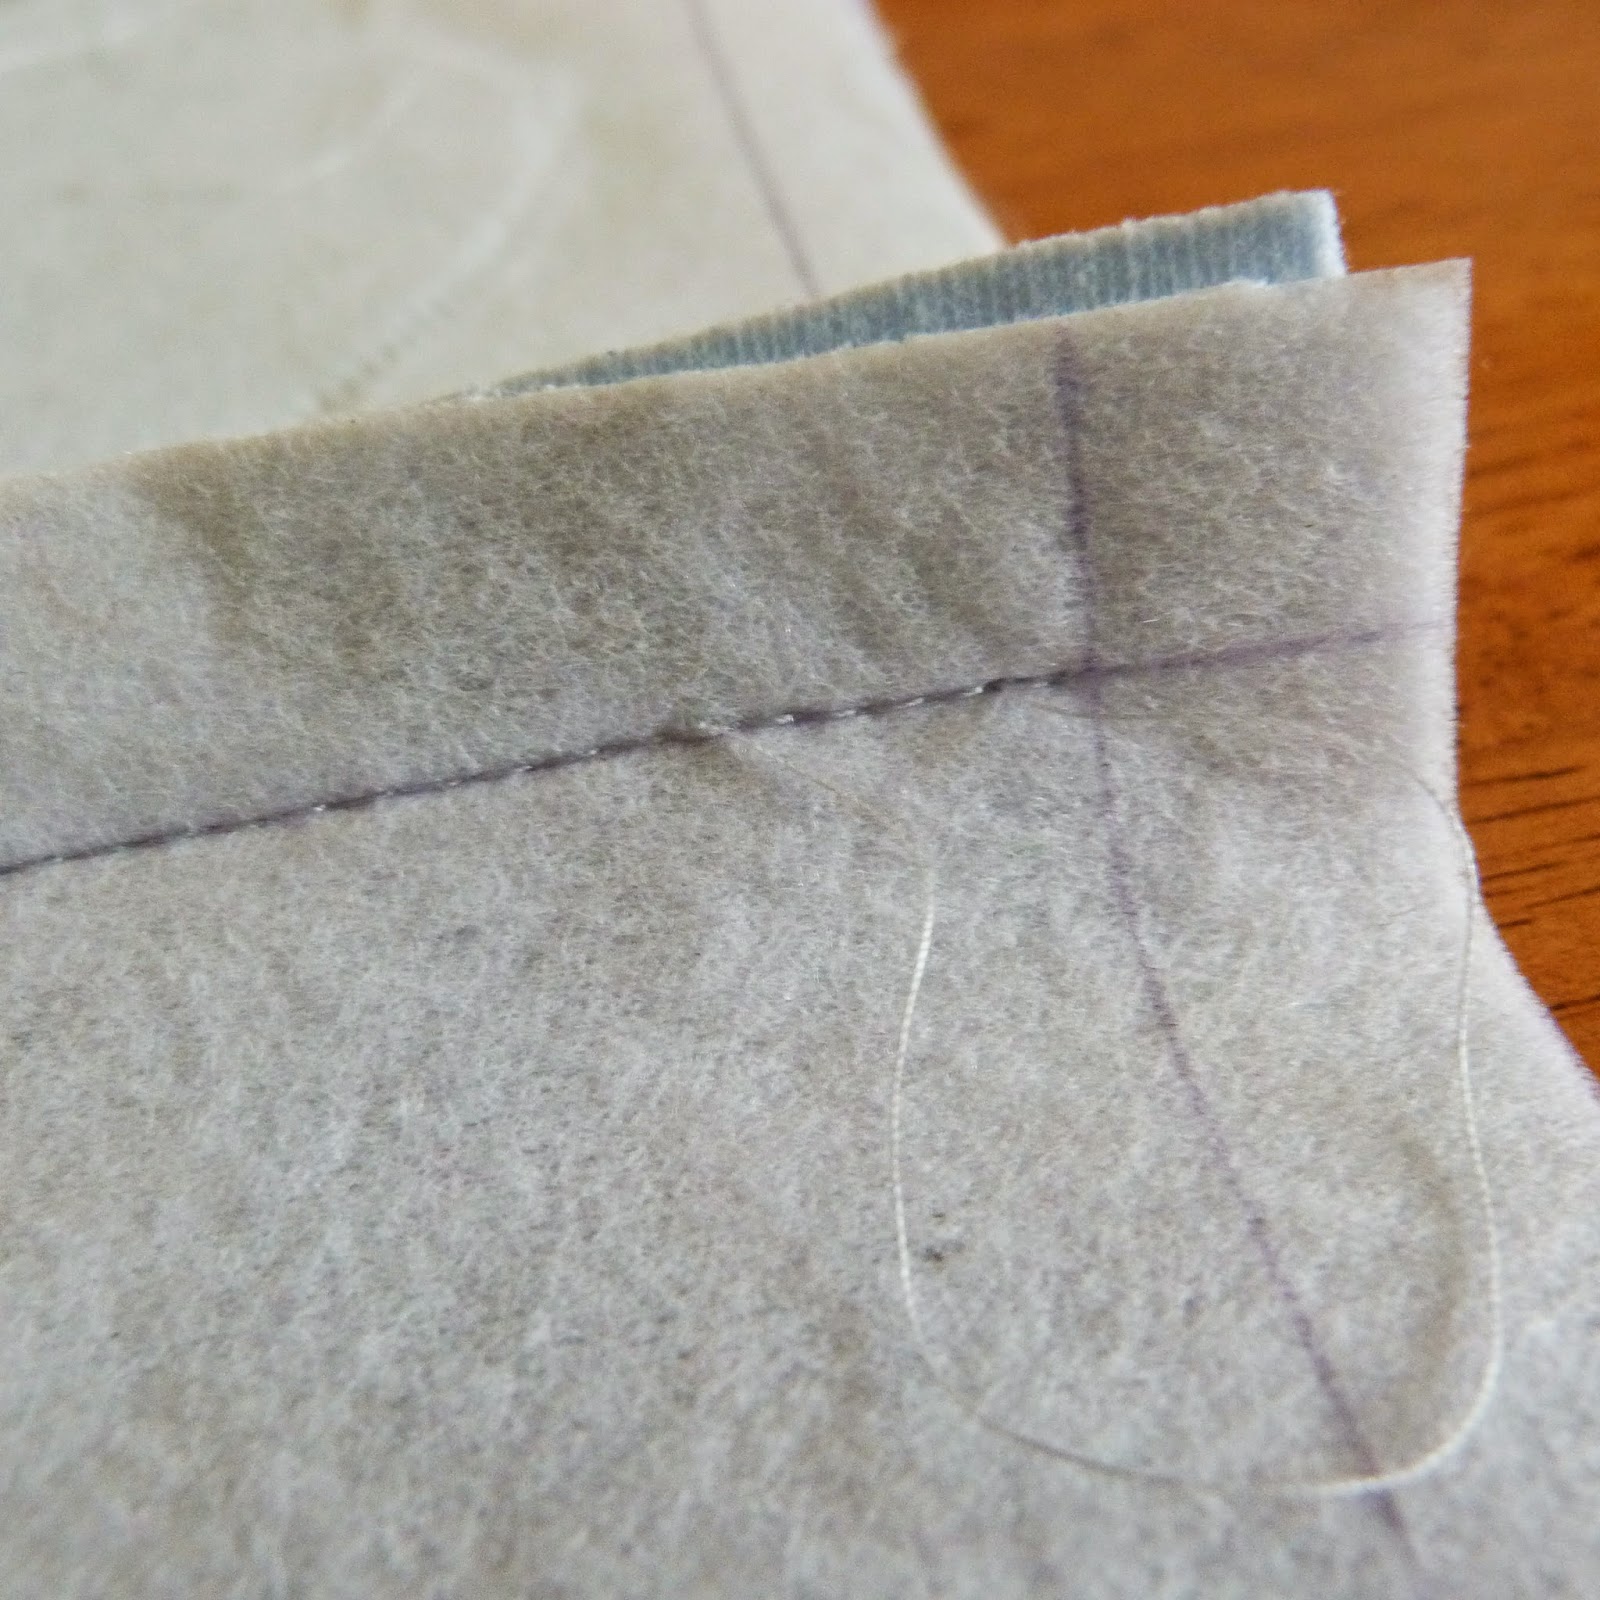
 2) Measure your fabric pieces to work out the largest size square you can cut from them. We managed to get 6" squares. Cut six 6" squares (or your required size) from your Vilene and mark 1/2" seam allowance guides on all edges with a pencil on the side that ISN'T iron-on (as shown in the picture below). Iron these Vilene squares onto the reverse of your vest or fabric pieces. We have placed some diagonally because we wanted the stripes on the finished cube to be diagonal.
 3) Iron the Vilene squares down on the reverse of your fabric and cut out the fabric following the edges of the Vilene. You will need 6 squares to make your cube.
 4) We wanted to be a bit fancy and add some applique - if you don't want to do this skip to instruction number 8.
These vests had little animal pictures on that we wanted to use. We cut a heart shape from "bondaweb" that matched the size of the applique we wanted to attach. Then we ironed this on the reverse of the picture - making sure to centre the picture as best as possible.
 5)Then we cut out the heart shape from the fabric following the edge of the ironed-on "bondaweb" heart. Removed the paper backing and then ironed on the hearts onto the centre of a couple of the cube squares.
 6) So you should now have 6 Vilene-backed squares with any applique on you fancy.
 7) Use a small zig-zag stitch to sew on any applique.
 8) Start stitching the squares together. Lay them with right sides facing each other and stitch together, following the 1/2" seam allowance guide. Make sure you begin and finish you stitching where the two seam allowance guides cross (otherwise your cube's corners won't work).
9) Continue joining squares to form a cross shape.
.JPG) 10) When you join the squares next door to other squares make sure to stop where the seam allowance guides cross - this will give you a nice sharp corner.
10) When you join the squares next door to other squares make sure to stop where the seam allowance guides cross - this will give you a nice sharp corner.

 12) Make sure you leave a gap in the final seam you join for turning. To keep your corners sharp - leave this gap in the centre of one seam and stitch together the final corners as before.
 13) Tie off any threads and turn your cube the right way out.
 14) We wanted our cube to rattle so we placed jingle bells inside a child-proof pot and put this inside the cube, well surrounded by stuffing. This is entirely optional, if you are not happy using a child-proof pot you could add teddy squeakers or just stuff the cube normally. Make sure you push stuffing hard into the corners of the cube to help it keep it's shape.
 15) Sew up the hole you stuffed your cube through and you're finished!
.JPG)
Yes, we are pleased to announce that our shop manager Rachael had a baby boy shortly after Christmas last year, so in his honour, here's a simple make, for all new arrivals. It can be made with cotton jersey fabric or upcycled babygrows - a lovely way to get more use from those first favourite outfits!
You will need:
At least three babygrows or vests (we used four, first size, vests)
Or..... a selection of any other fabrics. Cotton jerseys give you a lovely soft finish and organic options are great for chewing too! (One long quarter will be enough for your cube but it will look nicer if you use a variety of fabrics) Brushed cottons or minky-type "cuddles" fabric will give you fun textures for feeling.
One long quarter of Vilene
Some toy stuffing
Needles and thread and/or sewing machine
Scraps of "Bondaweb" if doing any applique
Jingle bells and child proof pot, or teddy squeakers, are optional
1) If you are using fabric by the metre skip to next instruction.
If you are using babygrows or vests, start by cutting away any seams and poppers, leaving the largest pieces of flat fabric you can. From vests you will get one piece from the front and one from the back. From babygrows you may get two pieces from the front or back.
These vests had little animal pictures on that we wanted to use. We cut a heart shape from "bondaweb" that matched the size of the applique we wanted to attach. Then we ironed this on the reverse of the picture - making sure to centre the picture as best as possible.
9) Continue joining squares to form a cross shape.
11) Keep working - stitching all the seams together - pulling your work up into a cube as you go. Be careful to only ever sew through two layers of fabric - it's easy to catch another layer in your stitching near the corners so make sure extra layers are pulled out of the way as you go.
All you need now is to find a small person to enjoy it!
Labels: baby, baby crafts, baby gift, baby make, baby project, baby toy, babygrows, how to, jersey, make, play cube, recycle, reuse, Tutorial, upcycle, upcycling
posted by eternal maker @ Tuesday, April 22, 2014
2 Comments
![]()
![]()


